Blog
Module 1: Instrumentation Fundamentals & Calibration

Universal Foundation for Safety, Quality & Compliance
1. SI Units: The Language of Measurement
Core Concept: Standardised units ensure consistency across industries.
Key Units:
- Pressure: Pascal (Pa), bar, psi
- Temperature: Kelvin (K), Celsius (°C), Fahrenheit (°F)
- Flow: m³/s, L/min, GPM
- Level: Meters (m), % of span
Industry Application:
- Nuclear: Precise Kelvin for reactor cooling.
- Oil & Gas: PSI/bar for pipeline pressure.
- Power: °C/°F for turbine exhaust monitoring.
Table: SI Unit Conversions
| Parameter | SI Unit | Industrial Equivalent |
|---|---|---|
| Pressure | 1 Pa | 0.00001 bar |
| Temperature | 0 K | -273.15°C |
| Flow | 1 m³/s | 15,850 GPM |
Visual:
- Animation: Global map showing SI units used in target industries (e.g., PSI in US pipelines, bar in EU refineries).
2. Accuracy, Precision & Errors
Definitions:
- Accuracy: Closeness to the true value.
- Precision: Repeatability of measurements.
- Error: Deviation from true value (e.g., ±0.5% FS).
Industry Impact:
- Safety: Inaccurate pressure readings ⇒ overpressure explosions.
- Quality: Imprecise temperature control ⇒ product defects.
Diagram: Accuracy vs. Precision
Caption: High accuracy + low precision = Consistent errors. High precision + low accuracy = Repeatable but wrong.
Visual:
- GIF: Dartboard analogy (accurate = bullseye, precise = tight cluster).
3. Range, Span & Linearity
Terminology:
- Range: Min/Max measurable values (e.g., -50°C to 150°C).
- Span: Difference between upper/lower limits (e.g., 200°C).
- Linearity: Output deviation from a straight line.
Table: Calibration Range Examples
| Instrument | Range | Span | Application |
|---|---|---|---|
| Pressure Transmitter | 0-600 psi | 600 psi | Hydraulic systems (Mfg) |
| RTD Sensor | -200°C to 500°C | 700°C | Reactor core (Nuclear) |
Visual:
- Graph: Linearity curve showing ideal vs. actual output.
4. Hysteresis & Deadband
Critical Concepts:
- Hysteresis: Output variation when input reverses direction (e.g., mechanical friction in valves).
- Deadband: Input range with no output change (e.g., stuck valve stem).
Industry Risks:
- Deadband in safety valves ⇒ Delayed shutdown in oil/gas emergencies.
- Hysteresis in nuclear control rods ⇒ Reactor instability.
Diagram: Hysteresis Loop
Caption: Hysteresis loop showing output lag during increasing/decreasing input.
Visual:
- Animation: Valve stem moving with/without hysteresis (contrast smooth vs. jerky motion).
5. Hands-On Calibration Procedures
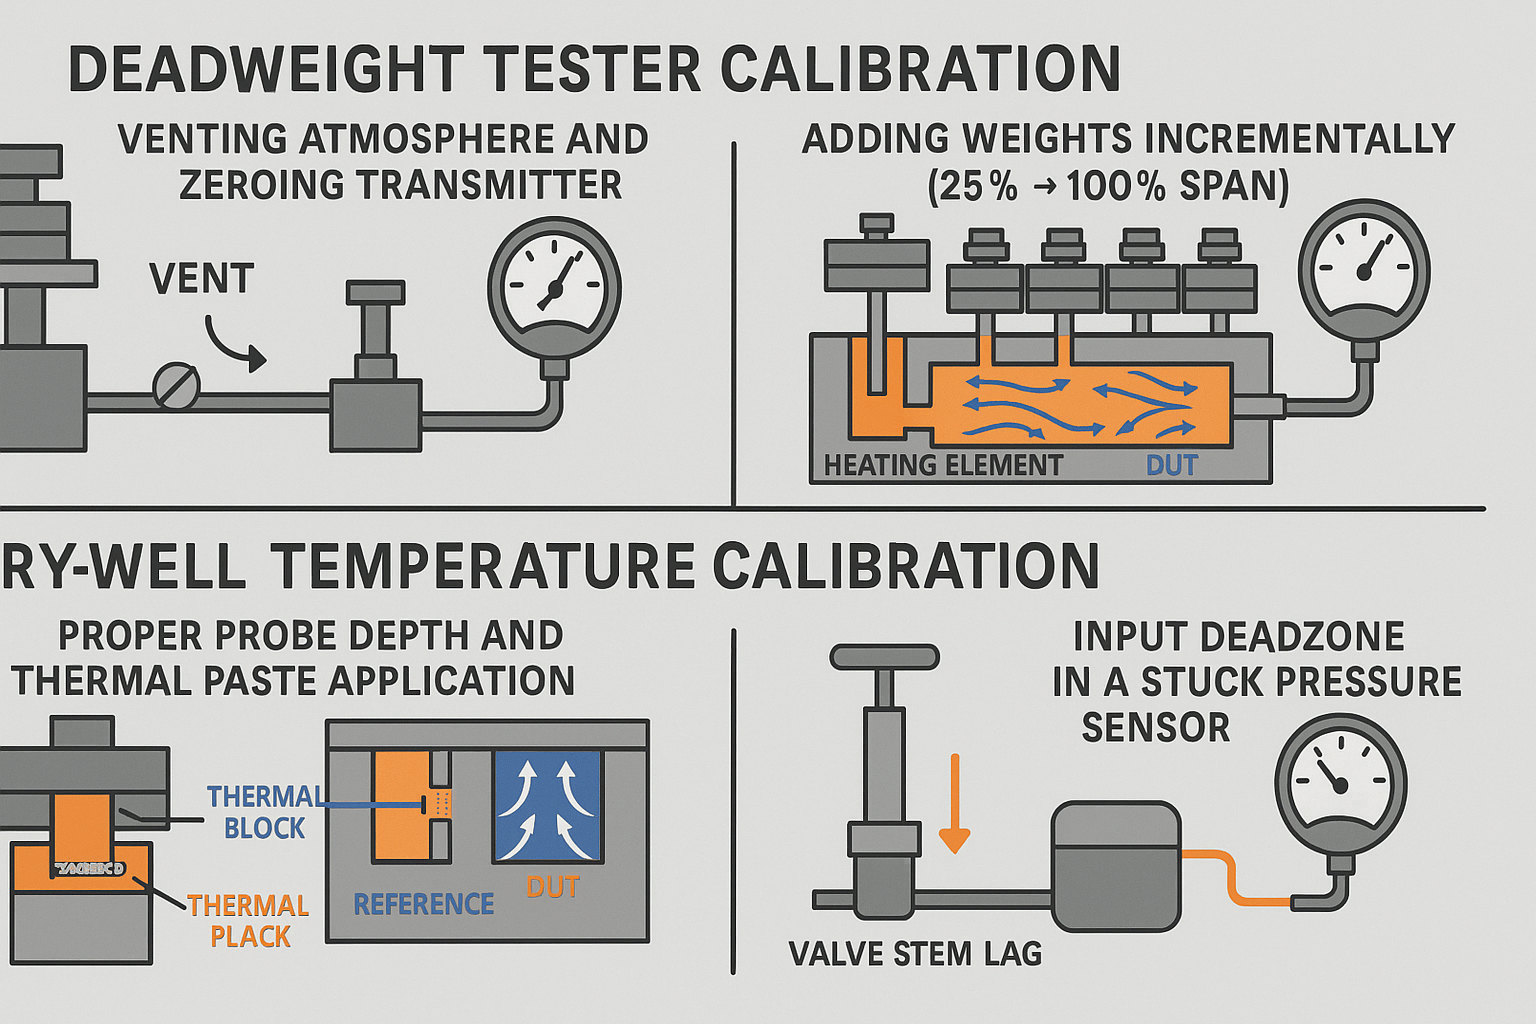
A. Pressure Calibration (Deadweight Tester)
Equipment:
- Deadweight tester (primary standard)
- Test gauge/transmitter
Step-by-Step:
- Zero Adjustment: Vent to atmosphere; set output to 0 psi.
- Apply Weights: Add calibrated masses (e.g., 100 psi = 100 lb on 1 in² piston).
- Record Output: Note gauge reading at 0%, 25%, 50%, 75%, 100% of span.
- Calculate Error:
Error = (Observed Value - Expected Value) / Span × 100. - Adjust Span/Zero: Trim potentiometers until error ≤ tolerance.
Safety Tip: Always wear PPE when handling high-pressure systems.
Visuals:
- Cross-Section: Deadweight tester internals (piston, weights, hydraulic fluid).
- GIF: Step-by-step weight loading sequence.
B. Temperature Calibration (Dry-Well)
Equipment:
- Dry-well calibrator (portable heat source)
- Reference RTD/thermocouple
- Device Under Test (DUT)
Step-by-Step:
- Insert Probes: Place DUT and reference sensor in dry-well wells.
- Setpoints: Test 0°C, 50°C, 100°C, 150°C (cover instrument range).
- Stabilize: Wait 15 mins per setpoint; record DUT vs. reference.
- As-Found Data: Document errors before adjustment.
- Trim DUT: Adjust zero/span via HART communicator or onboard buttons.
Industry Tip: In nuclear plants, use rad-hardened dry-wells near reactors.
Visuals:
- Animation: Heat flow path in dry-well (heater → block → sensors).
- GIF: Probe insertion best practices (depth, thermal paste application).
6. Industry-Specific Calibration Protocols
| Industry | Standard | Critical Instruments | Tolerance |
|---|---|---|---|
| Oil & Gas | API 570 | Pressure Safety Valves | ±1% FS |
| Nuclear | IEEE 344 | Reactor Coolant Temp Sensors | ±0.25% FS |
| Power | ASME B31.1 | Steam Flow Meters | ±0.5% FS |
| Manufacturing | ISO 9001 | Batch Reactor Controllers | ±1% FS |
Compliance Workflow

7. Summary: Key Takeaways
- Safety: Calibration prevents catastrophic failures (e.g., overpressure explosions).
- Quality: SI units + accuracy = product consistency.
- Compliance: Documentation satisfies ISO 9001, API, ASME.
- Tools: Deadweight testers (pressure) and dry-wells (temp) are field-proven.
Final Visual:
- Infographic: Calibration impact across industries:
- Oil/Gas: Prevents spills.
- Nuclear: Avoids meltdowns.
- Power: Ensures grid stability.
Next Module: [Pressure Measurement Techniques]
Feedback Loop: Submit calibration logs at [Tamfitronics.com/portal]
Visual Assets Package:

*© 2025 Tamfitronics. Complies with ISA 84, IEC 61511, and ANSI/NCSL Z540-1.


